Whether you’re an influencer showcasing your day, a content creator sharing behind-the-scenes shots, or an online shop promoting products, sometimes a single image just isn’t enough. That’s when knowing how to add multiple photos to Instagram Story becomes a game-changer.
Both iPhone and Android users can easily combine photos, create collages, or layer visuals to share richer stories that grab attention and boost engagement, and even get more views on Instagram stories
In this guide, we tell you the simplest and most effective ways to upload multiple photos, using Instagram’s built-in tools and creative third-party apps so your Stories look polished, professional, and ready to convert. Let’s improve your storytelling!
Table of Contents
ToggleHow to Put Multiple Pictures to Instagram Story
Based on your preferences, there are different methods for adding multiple photos to Instagram story. But if you want to learn how to upload multiple photos to Instagram from PC, we’ve got you covered.
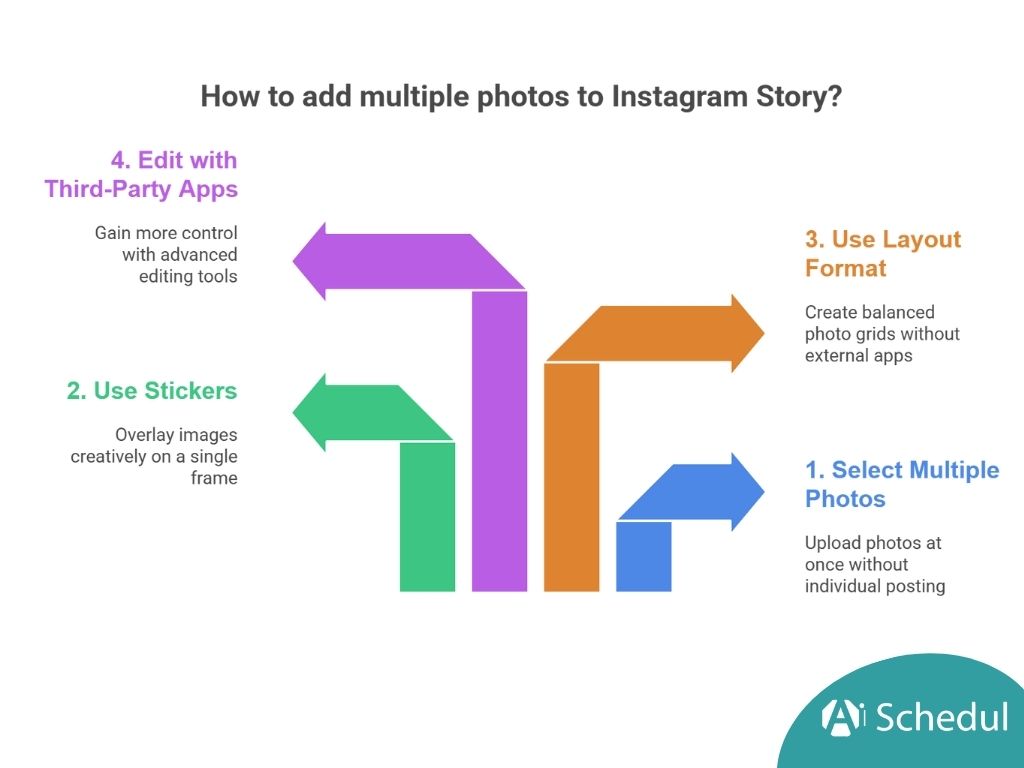
#1 Select Multiple Photos
If you want to post multiple stories at once without having to keep uploading them one by one, you can do this:
- Open your Instagram stories.
- Tap on ‘Select’
- Now, choose the pictures you want to add to your stories. You can hold and drag the pictures to reorder them.
- Edit each picture as you want and post your story.
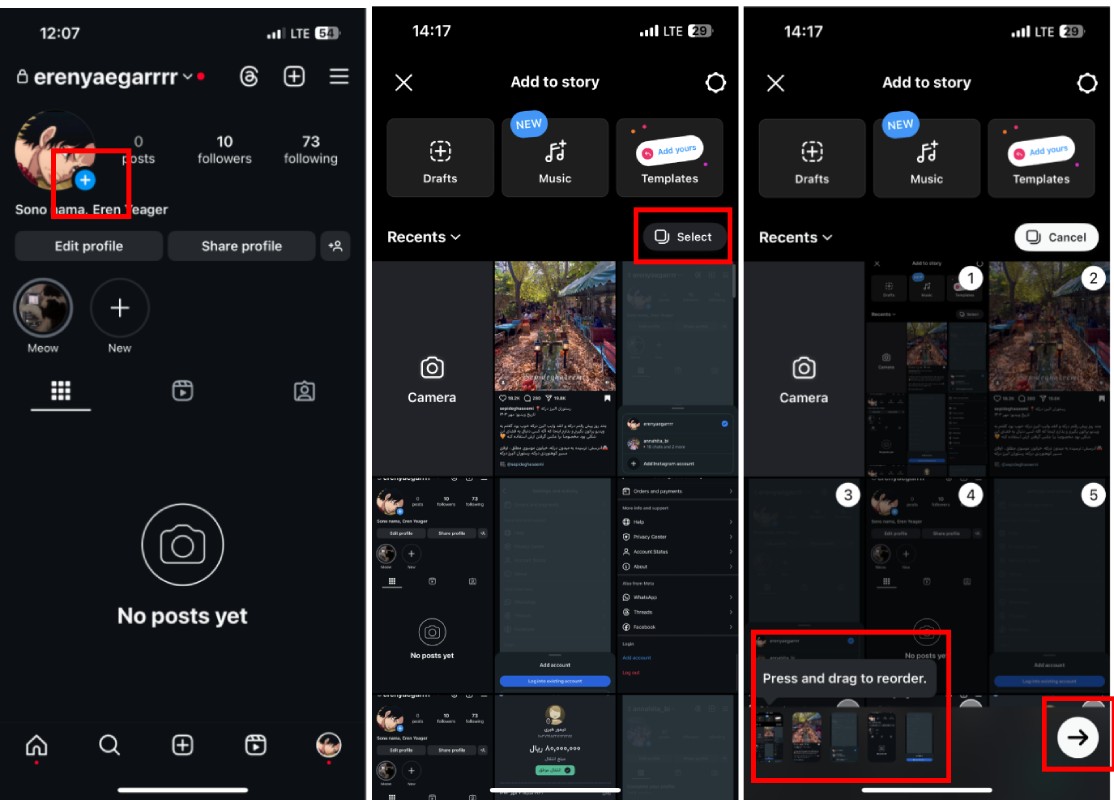
Using this method, you can upload each of your pictures to a single story, but you don’t have to keep adding them one by one.
#2 Use Stickers
Beyond layouts and slideshows, the sticker method offers you another way to add multiple photos to Instagram story with your creative freedom.
The photo sticker technique lets you overlay multiple images on a single frame:
- Open Instagram Stories and select or capture a background photo.
- Tap the sticker icon (located in the top right corner).

- Select the photo sticker option.
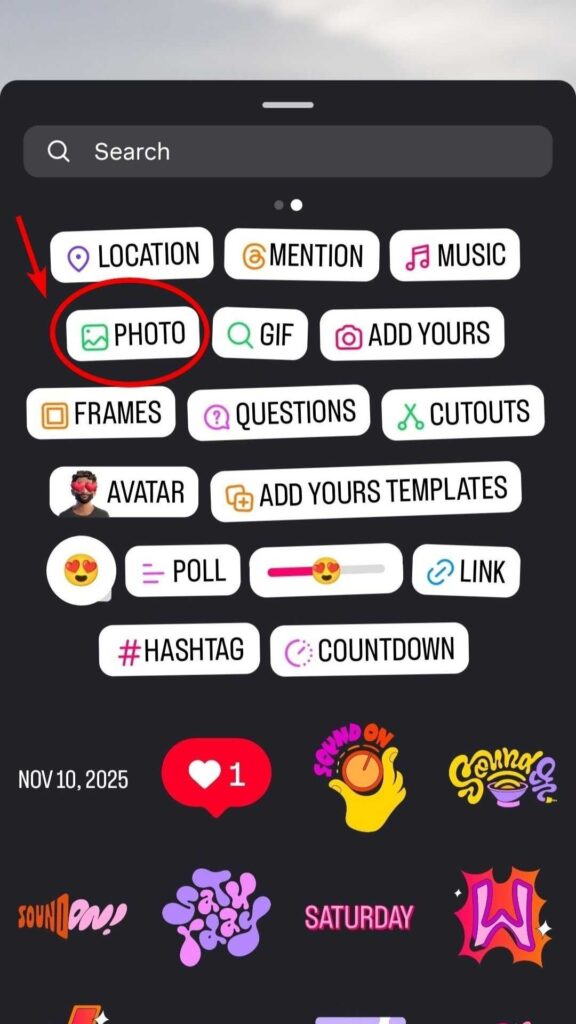
- Choose an image from your camera roll.
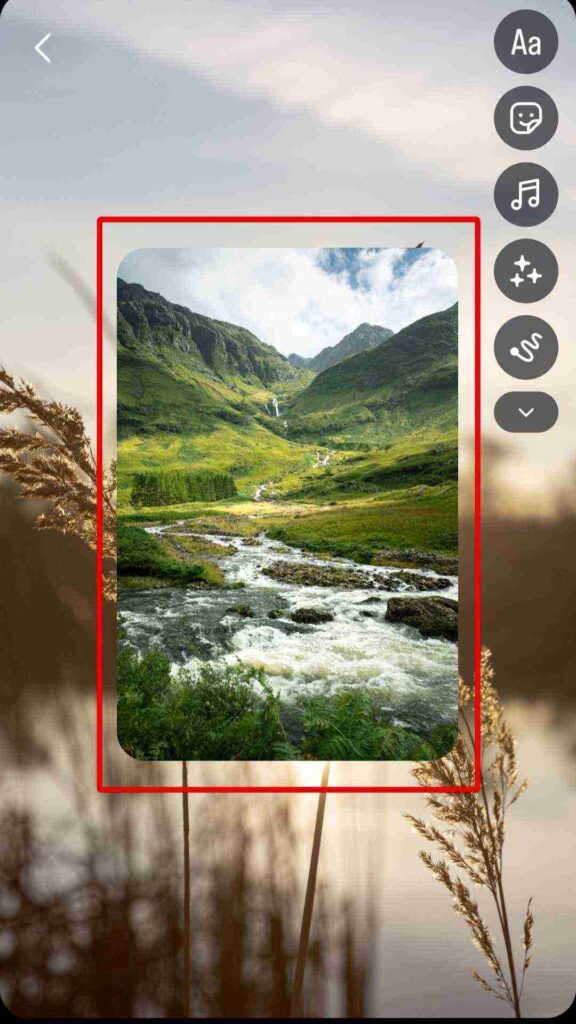
- Repeat to add multiple pictures to your Instagram story.
Alternatively, on iOS, you can copy images from your Camera Roll and then paste them directly into your story as stickers.

Resizing & Positioning Images
Once you’ve added photo stickers, customize them with these gestures:
| Action | How To Do It |
| Resize | Pinch in/out with two fingers |
| Reposition | Drag with one finger |
| Change shape | Tap the sticker to cycle through formats |
| Layer order | Press and hold, then drag up/down |
| Lock position | Hold and slide toward the padlock icon |
Instagram offers several frame styles; tap each photo sticker repeatedly to cycle through square, rounded, or custom shapes.
Creative Uses of Layering for Storytelling
The sticker method creates depth and visual interest in your stories:
- Overlay product photos at different angles to showcase details.
- Create before/after comparisons with partial transparency.
- Arrange photos in a scrapbook-style collage.
- Use solid color backgrounds with strategically placed photos.
Additionally, Instagram’s layer system lets you organize elements by holding them down and adjusting their position in the foreground or background.
#3 Use Layout Format
Make your Stories look creative and polished by combining multiple photos into a single, balanced layout. Instagram’s Layout tool lets you create clean photo grids without needing an external app.
- Open Instagram and go to Stories, either swipe right from the Feed or tap your profile picture.
- In the camera screen, swipe the mode list on the left and select Layout (or tap the Layout icon).

- Pick a grid pattern that fits your images.
- Fill each cell by tapping it: take a new photo with the camera or use the gallery thumbnail (bottom-left) to insert existing pictures.
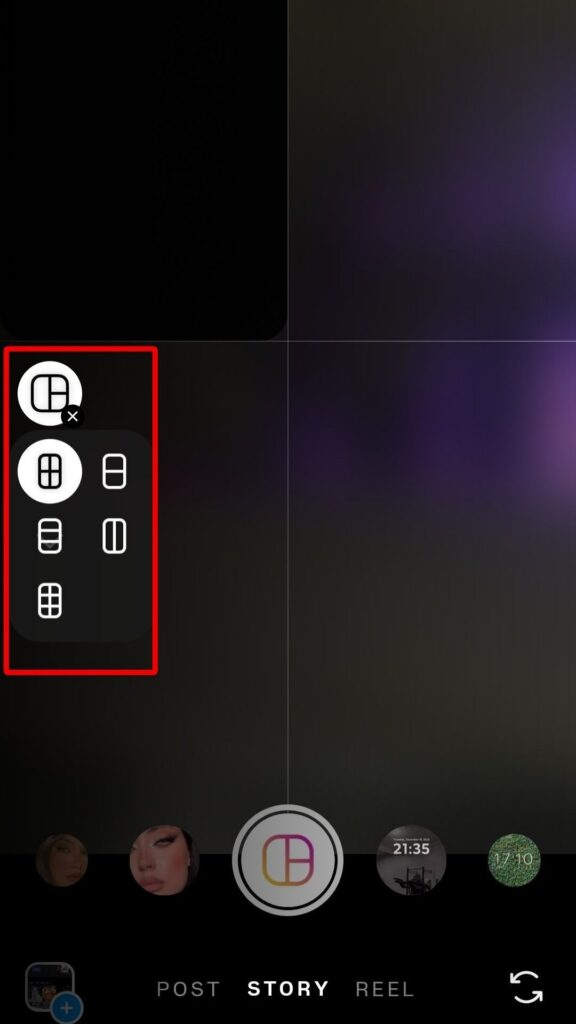
- Adjust each image inside its cell by pinching to zoom and dragging to reposition; tap a cell again to retake or replace the photo.
- When you’re happy with the composition, tap Done (checkmark) to open the Story editor.
Add finishing touches(text, stickers, GIFs, music, or drawing), then post to Your Story or send to specific friends.
#4 Edit Photos with Third-Party Apps
Want to have more control than Instagram’s built-in Layout? You can use third-party apps like Canva, InShot, Unfold, StoryArt, etc., to make polished collages, multi-photo layouts, or stacked slides, then save and upload the finished image to your Story.
- Open your chosen app (We picked Canva).
- Choose an Instagram Story template, or you can search and easily find it. This keeps your finished image full-screen on Stories.
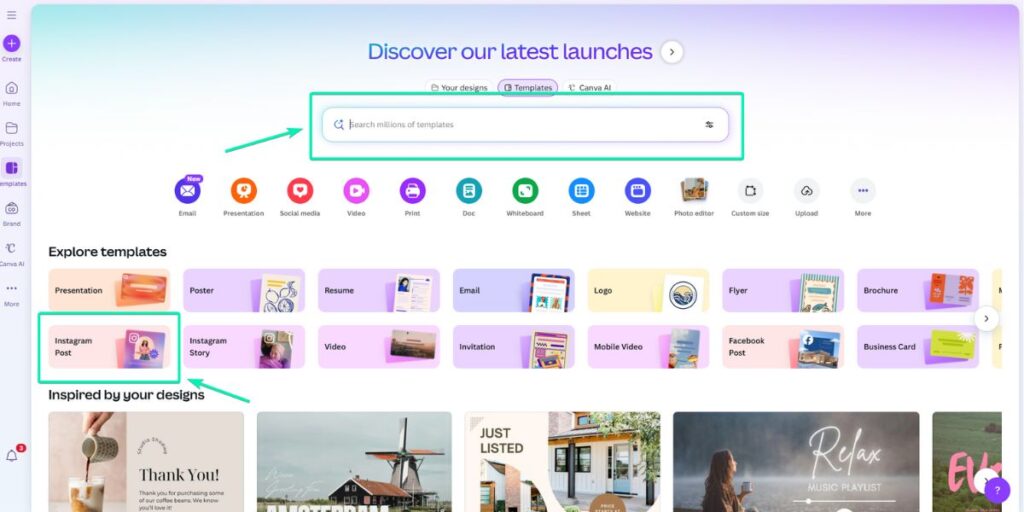
- Check templates and choose your favorite.
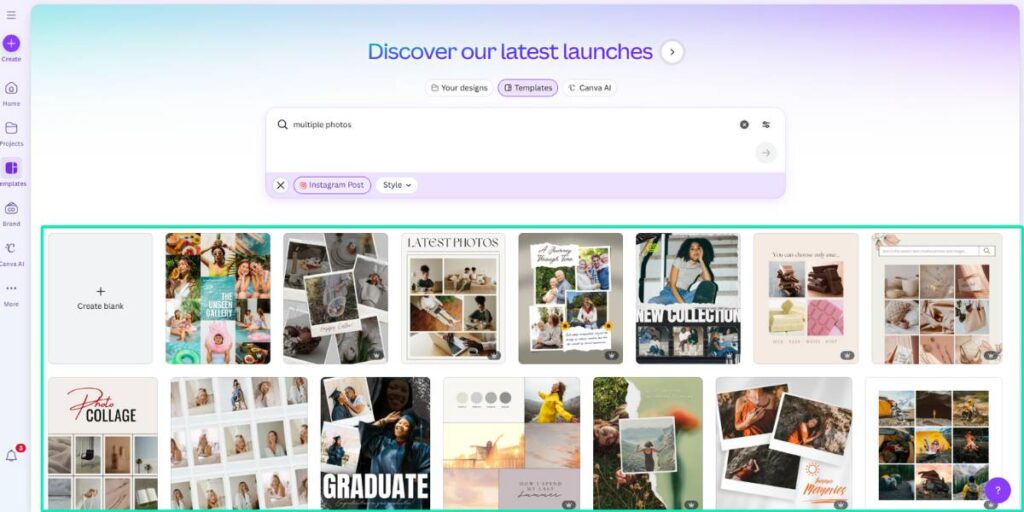
- Add multiple photos into a grid or collage frame (drag & drop photos into slots, or layer them).
- Edit: resize/crop, add text, stickers, GIFs, or music overlays (if the app supports video export). Aim for readable text and clear focal points.
- Export / save the final image or video in high quality (PNG/JPEG for images, MP4 if you used animated elements).
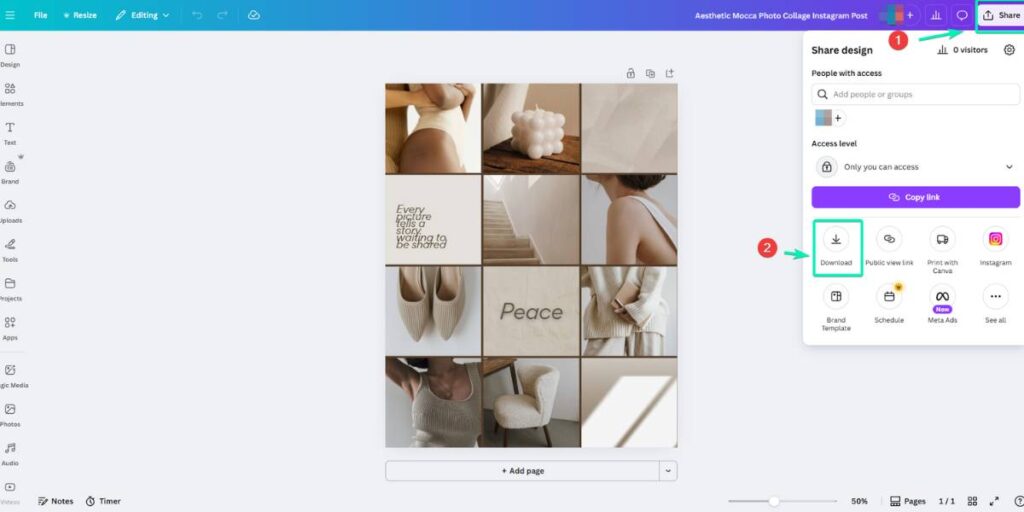
- Open Instagram → Story camera → swipe up (or tap gallery) → select your saved collage(s) → post. If you exported multiple separate slides, upload them in the order you want viewers to see them.
Benefits of Adding Multiple Photos to an Instagram Story
You may wonder why adding multiple photos to an Instagram Story? The following benefits can convince you using this feature will be helpful for your business:

- Increases engagement and time spent: multi-photo Stories/carousels keep viewers watching longer and interacting more.
- You can tell a richer story or step-by-step sequence (tutorials, event recaps, before→after).
- Shares more content without spamming followers’ feeds (packs several moments into one Story flow).
- Shows product details or multiple angles in one place (improving shoppers’ understanding and purchase intent).
- Saves time (Instagram’s Layout / “select multiple” features let you add several photos at once and edit them before posting).
- Encourages interaction (stickers, polls, “Add Yours,” and CTAs work across multiple slides).
- Let you A/B test creative quickly (compare visuals, captions, or CTAs slide-to-slide).
- Highlights UGC, event highlights, or testimonials in one compact sequence (great for social proof).
- Improves visual variety (collages, grids, and mixed media make Stories more eye-catching).
- Provides more analytics points per story (which slides performed best), so you can refine content strategy.
How to Maximize Multiple Photo Story Engagement
- Hook with a powerful first slide.
- Follow a simple story flow: Hook → Problem → Solution → CTA.
- Use one clear idea per slide.
- Add value on every frame with tips, steps, or insights.
- Add swipe cues like arrows or “→ swipe” text.
- Optimize for mobile readability.
- Keep a consistent style across slides.
- Mix photos, graphics, and short clips.
- Add music that fits the mood.
- Add links to Instagram Story where available.
- Use polls and interactive stickers.
- Highlight key words or stats using bold/contrast.
- Make content screenshot-friendly and shareable.
- Compare products and ask viewers to vote.
- End with a strong CTA on the last slide.
- Apply filters or effects consistently.
- Re-share top slides to Stories and tag relevant accounts.
- Track saves, shares, and swipe completion.
- Test different first-slide hooks, music, and CTAs.
- Use evergreen formats like checklists or frameworks.
- Reposting content is also another way to increase engagement, so it’s good to learn how to repost multiple photos on Instagram.
Wrapping Up
After reading the above step-by-step guide for how to add multiple photos to your Instagram story, you can easily create engaging stories for your account.
Whether you are an influencer, a content creator, or managing an online shop, you can use our guide to create visually interesting stories with multiple photos that attract the eyes and convert visitors into your interested fans.
FAQs
How Do I Make a Collage on an Instagram Story?
1. Open Instagram and start adding a new story.
2. Start with a base image, or simply add a blank background.
3. Tap on the sticker icon and select the ‘Photo’ sticker to add more pictures if you want.
4. Resize and position each image as you want to create a collage effect.
5. Add text, stickers, or effects, and then post it to your story.*How Do I Add Multiple Photos to an Instagram Story with Music?
1. Open Instagram and start adding a new story,
2. Choose the picture you want to post to your story,
3. Tap on the sticker icon on the top right side of the screen,
4. Select the ‘Music’ sticker. Choose the song you want,
5. Tap on the sticker icon and select the ‘Photo’ sticker to add more pictures.
6. Share your story.
If you don’t want to do a collage for your story, you can first add all your images using the Instagram Layout feature and then add music to your story.Why can’t I add multiple photos to my Instagram Story?
If Instagram won’t let you add multiple photos, try these quick fixes:
1. Update the app and restart your phone.
2. Check photo permissions (iPhone: All Photos, Android: storage permission + clear Instagram’s cache).
3. You can also report the bug via Settings → Help → Report a Problem.
4. If it’s still missing, reinstall the app or create the collage in Canva/Unfold/InShot and upload it as one image.

